I wanted to share with you another gift I made for Christmas. Have you ever made a fabric-covered message board? I actually hadn't, but with all the tutorials out there, I found it very easy to follow along. And I'll add my step-by-step to the list too. It's so easy, and if you haven't tried it, you should! It's a simple and satisfying project you can finish in a couple of hours (last-minute gift idea?!).

1. Start with a piece of homasote. I bought it at Home Depot and had them cut it to size for me. It comes in pretty large sheets, so I had them cut the leftovers too, and now I have a few message boards-to-be waiting in the wings.
2. Begin stapling batting around the board, taking care to pull taut (but not tight) and folding corners well, so there's a minimum of bulk there. I chose a pretty thin batting, but you could choose a thicker one, depending on how much of a padded look you want to the front of your finished board.
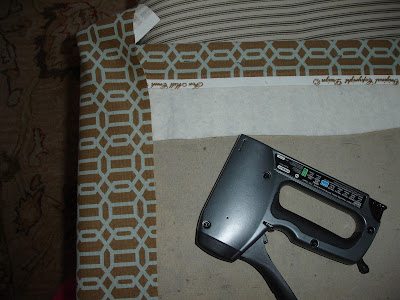
3. Begin stapling your fabric in the same way you stapled your batting. I was pretty excited to find this fabric, in colors that'll work in my sister's home office, for half off at Joann's, which brought it to about $5/yard. At that rate, you could make message boards for everyone in your family and your neighbors!
Anyway, make sure to line up your pattern along the edge and to center it (if you can!). I did not center my fabric on the front (shame!), but because it's a small pattern didn't make too much of a difference. With a big pattern though, you definitely want it to be centered, so turn it over, take your time (I am not good at this!), and take a good look (get out the measuring tape if you need to) before you punch that first staple in. When you're done stapling, trim any excess fabric from the back.
5. Turn over your board and lay out some ribbon in a pattern you like. (You'll notice in the next picture that I changed my layout, so take your time here too!) Make sure your ribbon pattern is centered on the front of your board. Again, take out the measuring tape and be sure. You don't want to tack all your upholstery nails in and then have to pull them out again when you hold up your finished product and notice your ribbons all seem a little closer to the left edge of your board. You're learning from my mistakes, people!
So, when your ribbon pattern is centered, push upholstery nails in the spots where the ribbons meet and at the ends. You can also use a rubber mallet to hammer them in. The nails will hold the notes, photos, cards, and messages you'll slide between the ribbons.
6. Admire your finished board. Nice job! Now, what else can I cover and staple? Seriously, this project is addictive. As for this gift, I really hope my sister and her family like it. I'm so happy to give them something personal and creative. Oh, and I sincerely hope she has not been reading this and that it'll be a surprise come Christmas!


2 comments
It looks great Casey and the ribbon design makes it extra special. Your sister and her family will love it. I'm with you on hand made gifts - they mean so much more.
-Rene
Love this, you could do whatever pattern you liked. Great idea.
Post a Comment